Community hub
Recent from talks
Knowledge base stats:
Talk channels stats:
Members stats:
Battle of Madang
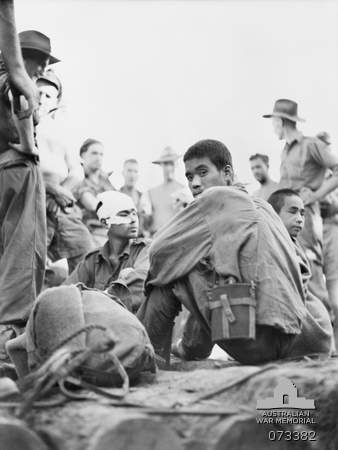
The Battle of Madang, fought between early February and late April 1944, was the break-out and pursuit phase of the Markham and Ramu Valley – Finisterre Range and Huon Peninsula campaigns, which were part of the wider New Guinea campaign of World War II. After overcoming the Japanese defences around Shaggy Ridge, the Australian forces descended the steep slopes of the Finisterre Range and pursued the withdrawing Japanese towards Bogadjim and then Madang on the north coast of New Guinea. There they linked up with US and Australian forces that had advanced along the coast from the Huon Peninsula, while the remnants of three Japanese divisions withdrew towards Wewak, where further fighting would take place throughout late 1944 and into 1945.
Situated on the north-eastern coast of Papua New Guinea on the Schering Peninsula, which juts out into the northern part of Astrolabe Bay, Madang offers a protected deep-water port open to communication through the Vitiaz Strait and the Bismarck Sea. Established as the capital of German New Guinea prior to World War I, during the German administration of the area, the town of Madang had been known as Friedrich-Wilhelmshafen. Following the war, the area had been placed under Australian administration in 1920 and had subsequently been renamed. The pre-war population of the area was estimated at around 25,000 to 30,000 indigenous inhabitants within the greater Madang area, with under 100 Asians and around 200 Europeans. The European population was largely evacuated from the town in late 1941 and early 1942.
The harbour is landlocked and set in a lagoon that runs between Cape Barschtsch and the Schering Peninsula. Seawards, it is protected by Kranket Island. Bounded by the Adelbert Range to the east and Cape Barschtsch to the north, the town sits on a flat coastal strip that consists of some swampy areas, plantations and grassed areas. Further inland, the vegetation grows more dense, although at the time of the battle it was passable, particularly on foot. The terrain is less rugged than the Finisterre Range to the south and there are no especially high features, although it is more difficult north of the Gogol River, which flows into Astrolabe Bay about halfway along the coast between Bogadjim and Madang. This river, along with several others including the Gori and Palpa, form significant obstacles along the southern approaches to the town.
Madang was captured by the Japanese in early March 1942, along with Lae and Salamaua as part of operations to establish a key base at Rabaul. After this, the Japanese had worked to improve various means of communication around the area including roads, port facilities and airfields to utilise Madang's deep-water harbour as part of a forward base, which was established around Madang and Alexishafen, 8.25 miles (13.28 km) north, to support forces in the Salamaua–Lae area. In 1943–1944, Australian and US forces began offensive actions in New Guinea, having stemmed the tide of the Japanese advance during the fighting in 1942. In September 1943, the Allies had secured Lae and Nadzab. Shortly afterwards, the 9th Division had landed on the Huon Peninsula and had subsequently secured Finschhafen and began clearing inland. By October 1943, the next objective for the Australians was Shaggy Ridge, a series of high positions on the inland route from Dumpu to Madang, which was held by Japanese infantry, supported by artillery and engineers.
After the defeat of the Japanese in the Battle of Shaggy Ridge in late January 1944, the remnants of the Japanese 78th Infantry Regiment, assigned to Lieutenant General Shigeru Katagiri's 20th Division, part of Lieutenant General Hatazō Adachi's 18th Army, began a withdrawal from the Finisterre Range and was tasked with reorganising itself around Madang and carrying out delaying actions. Around the same time, Hidemitsu Nakano's 51st Division, began withdrawing west along the coast from the Finschaffen area, undertaking a difficult march to bypass Saidor following the landing there by US troops. These moves were part of a general withdrawal that would see the Japanese move beyond the Sepik River towards Aitape and Wewak, with one division ultimately being sent to Hollandia.
The withdrawal of Japanese troops towards Madang enabled the Australian Army forces to break through the Japanese positions in the Finisterre Mountains, which had been holding up their drive north. After a brief pause to bring up supplies, and to rotate troops as the Australian 11th Division under Major General Allan Boase replaced George Vasey's 7th Division, the Australians slowly advanced down the rugged, densely forested slopes of the Finisterres, pursuing the withdrawing Japanese towards Bogadjim on the northern coast, about 20 miles (32 km) away.
For the advance, two infantry battalions from the Australian 15th Infantry Brigade – the 57th/60th and 58th/59th – were given the task of pushing forward from Kankiryo towards Madang via the Mindjim River, Astrolabe Bay and Bogadjim. The brigade's third infantry battalion, the 24th, was held back in reserve maintaining a defensive posture around Shaggy Ridge, while also pushing forward on the Australians' western flank along the Ramu River towards Kesawai and Koropa. At the same time, US troops would advance east from their base around Saidor about 40 miles (64 km). In the final stages of the battle, Australian troops from the 8th Infantry Brigade would be moved up the coast by sea from Saidor.
In the early stages of the pursuit, the Australians sent long-range patrols forward from the Finisterres, while two battalions from the US 32nd Infantry Division landed around the Yalau Plantation as US forces advanced east from Saidor. They began patrolling operations around the coast to the east and west, fighting minor skirmishes, and pushed towards Bau Plantation and Yangalum, on the eastern side of the Australian advance with the intention of linking up. Throughout February and March, the Japanese 20th Division withdrew towards Madang, fighting a series of rearguard actions against the Australians that were advancing from Kankiryo. The going was tough for the troops of the Australian 15th Infantry Brigade who advanced slowly towards Bogadjim, using aggressive patrols to advance their position forwards. The Japanese began strengthening their defences around Bogadjim at this time, constructing a series of outposts in a 5-mile (8.0 km) radius to the south of the town; nevertheless, Australian patrols were able to bypass these and penetrate towards Erima Plantation where intelligence received from locals indicated large concentrations of Japanese forces.
Hub AI
Battle of Madang AI simulator
(@Battle of Madang_simulator)
Battle of Madang
The Battle of Madang, fought between early February and late April 1944, was the break-out and pursuit phase of the Markham and Ramu Valley – Finisterre Range and Huon Peninsula campaigns, which were part of the wider New Guinea campaign of World War II. After overcoming the Japanese defences around Shaggy Ridge, the Australian forces descended the steep slopes of the Finisterre Range and pursued the withdrawing Japanese towards Bogadjim and then Madang on the north coast of New Guinea. There they linked up with US and Australian forces that had advanced along the coast from the Huon Peninsula, while the remnants of three Japanese divisions withdrew towards Wewak, where further fighting would take place throughout late 1944 and into 1945.
Situated on the north-eastern coast of Papua New Guinea on the Schering Peninsula, which juts out into the northern part of Astrolabe Bay, Madang offers a protected deep-water port open to communication through the Vitiaz Strait and the Bismarck Sea. Established as the capital of German New Guinea prior to World War I, during the German administration of the area, the town of Madang had been known as Friedrich-Wilhelmshafen. Following the war, the area had been placed under Australian administration in 1920 and had subsequently been renamed. The pre-war population of the area was estimated at around 25,000 to 30,000 indigenous inhabitants within the greater Madang area, with under 100 Asians and around 200 Europeans. The European population was largely evacuated from the town in late 1941 and early 1942.
The harbour is landlocked and set in a lagoon that runs between Cape Barschtsch and the Schering Peninsula. Seawards, it is protected by Kranket Island. Bounded by the Adelbert Range to the east and Cape Barschtsch to the north, the town sits on a flat coastal strip that consists of some swampy areas, plantations and grassed areas. Further inland, the vegetation grows more dense, although at the time of the battle it was passable, particularly on foot. The terrain is less rugged than the Finisterre Range to the south and there are no especially high features, although it is more difficult north of the Gogol River, which flows into Astrolabe Bay about halfway along the coast between Bogadjim and Madang. This river, along with several others including the Gori and Palpa, form significant obstacles along the southern approaches to the town.
Madang was captured by the Japanese in early March 1942, along with Lae and Salamaua as part of operations to establish a key base at Rabaul. After this, the Japanese had worked to improve various means of communication around the area including roads, port facilities and airfields to utilise Madang's deep-water harbour as part of a forward base, which was established around Madang and Alexishafen, 8.25 miles (13.28 km) north, to support forces in the Salamaua–Lae area. In 1943–1944, Australian and US forces began offensive actions in New Guinea, having stemmed the tide of the Japanese advance during the fighting in 1942. In September 1943, the Allies had secured Lae and Nadzab. Shortly afterwards, the 9th Division had landed on the Huon Peninsula and had subsequently secured Finschhafen and began clearing inland. By October 1943, the next objective for the Australians was Shaggy Ridge, a series of high positions on the inland route from Dumpu to Madang, which was held by Japanese infantry, supported by artillery and engineers.
After the defeat of the Japanese in the Battle of Shaggy Ridge in late January 1944, the remnants of the Japanese 78th Infantry Regiment, assigned to Lieutenant General Shigeru Katagiri's 20th Division, part of Lieutenant General Hatazō Adachi's 18th Army, began a withdrawal from the Finisterre Range and was tasked with reorganising itself around Madang and carrying out delaying actions. Around the same time, Hidemitsu Nakano's 51st Division, began withdrawing west along the coast from the Finschaffen area, undertaking a difficult march to bypass Saidor following the landing there by US troops. These moves were part of a general withdrawal that would see the Japanese move beyond the Sepik River towards Aitape and Wewak, with one division ultimately being sent to Hollandia.
The withdrawal of Japanese troops towards Madang enabled the Australian Army forces to break through the Japanese positions in the Finisterre Mountains, which had been holding up their drive north. After a brief pause to bring up supplies, and to rotate troops as the Australian 11th Division under Major General Allan Boase replaced George Vasey's 7th Division, the Australians slowly advanced down the rugged, densely forested slopes of the Finisterres, pursuing the withdrawing Japanese towards Bogadjim on the northern coast, about 20 miles (32 km) away.
For the advance, two infantry battalions from the Australian 15th Infantry Brigade – the 57th/60th and 58th/59th – were given the task of pushing forward from Kankiryo towards Madang via the Mindjim River, Astrolabe Bay and Bogadjim. The brigade's third infantry battalion, the 24th, was held back in reserve maintaining a defensive posture around Shaggy Ridge, while also pushing forward on the Australians' western flank along the Ramu River towards Kesawai and Koropa. At the same time, US troops would advance east from their base around Saidor about 40 miles (64 km). In the final stages of the battle, Australian troops from the 8th Infantry Brigade would be moved up the coast by sea from Saidor.
In the early stages of the pursuit, the Australians sent long-range patrols forward from the Finisterres, while two battalions from the US 32nd Infantry Division landed around the Yalau Plantation as US forces advanced east from Saidor. They began patrolling operations around the coast to the east and west, fighting minor skirmishes, and pushed towards Bau Plantation and Yangalum, on the eastern side of the Australian advance with the intention of linking up. Throughout February and March, the Japanese 20th Division withdrew towards Madang, fighting a series of rearguard actions against the Australians that were advancing from Kankiryo. The going was tough for the troops of the Australian 15th Infantry Brigade who advanced slowly towards Bogadjim, using aggressive patrols to advance their position forwards. The Japanese began strengthening their defences around Bogadjim at this time, constructing a series of outposts in a 5-mile (8.0 km) radius to the south of the town; nevertheless, Australian patrols were able to bypass these and penetrate towards Erima Plantation where intelligence received from locals indicated large concentrations of Japanese forces.