

Community hub
Recent from talks
Contribute something
Nothing was collected or created yet.
Raid on the Medway
View on Wikipedia
| Raid on the Medway | |||||||
|---|---|---|---|---|---|---|---|
| Part of the Second Anglo-Dutch War | |||||||
 Attack On The Medway, June 1667 Willem van der Stoop | |||||||
| |||||||
| Belligerents | |||||||
|
|
| ||||||
| Commanders and leaders | |||||||
| Strength | |||||||
|
| ||||||
| Casualties and losses | |||||||
| |||||||
 Location within England | |||||||
The Raid on the Medway, during the Second Anglo-Dutch War between 12 June to 14 June 1667, was a successful attack conducted by the Dutch navy on English warships laid up in the fleet anchorages off Chatham Dockyard and Gillingham in the county of Kent. At the time, the fortress of Upnor Castle and a barrier chain called the "Gillingham Line" were supposed to protect the English ships.
The Dutch, under nominal command of Willem Joseph van Ghent and Lieutenant-Admiral Michiel de Ruyter, over several days bombarded and captured the town of Sheerness, sailed up the Thames Estuary to Gravesend, then sailed into the River Medway to Chatham and Gillingham, where they engaged fortifications with cannon fire, burned or captured three capital ships and ten more ships of the line, and captured and towed away the flagship of the English fleet, HMS Royal Charles, the stern of which is still on display at the Rijksmuseum in Amsterdam.
Politically, the raid was disastrous for the war plans of Charles II of England. It led to a quick end to the war, and a favourable peace for the Dutch. The raid was one of the worst defeats in both the history of the Royal Navy and British military history more broadly speaking.[3] Horace George Franks called it the "most serious defeat it has ever had in its home waters."[4]
Prelude
[edit]In 1667 Charles II's active fleet was in a reduced state due to recent expenditure restrictions, with the remaining "big ships" laid up. The Dutch seized this opportunity to attack the English. They had made earlier plans for such an attack in 1666 after the Four Days' Battle but were prevented from carrying them out by their defeat in the St James's Day Battle. The mastermind behind the plan was the leading Dutch politician Grand Pensionary Johan de Witt. His brother Cornelis de Witt accompanied the fleet to supervise. Peace negotiations had been in progress at Breda since March, but Charles had been procrastinating over the signing of peace, hoping to improve his position through secret French assistance.[5] Based on these assumptions De Witt thought it best to end the war quickly with a clear victory, thereby ensuring a more advantageous settlement for the Dutch Republic. Most Dutch flag officers had strong doubts about the feasibility of such a daring attack, fearing the treacherous shoals in the Thames Estuary, but they obeyed orders nevertheless. The Dutch made use of two English pilots who had defected, one a dissenter named Robert Holland, the other a smuggler who had fled English justice.
Raid
[edit]This section needs additional citations for verification. (June 2012) |
Dutch approach
[edit]On 17 May the squadron of the Admiralty of Rotterdam with De Ruyter sailed to Texel to join those of Amsterdam and the Northern Quarter. Hearing that the squadron of Frisia was not yet ready because of recruiting problems (impressment being forbidden in the Republic), he left for the Schooneveld off the Dutch coast to join the squadron of Zealand that, however, suffered from similar problems. De Ruyter then departed for the Thames on 4 June (Old Style used by the English, the Dutch at the time were officially using New Style dates) with 62 frigates or ships-of-the-line, about fifteen lighter ships and twelve fireships, when the wind turned to the east. The fleet was reorganised into three squadrons: the first was commanded by De Ruyter himself, with as Vice-Admiral Johan de Liefde and Rear-Admiral Jan Jansse van Nes; the second was commanded by Lieutenant-Admiral Aert Jansse van Nes with as Vice-Admiral Enno Doedes Star and Rear-Admiral Willem van der Zaan; the third was commanded by Lieutenant-Admiral Baron Willem Joseph van Ghent with Lieutenant-Admiral Jan van Meppel in subcommand and as Vice-Admirals Isaac Sweers and Volckert Schram and as Rear-Admirals David Vlugh and Jan Gideonsz Verburgh.[6] The third squadron thus effectively had a second set of commanders; this was done to use these as flag officers of a special frigate landing force, to be formed on arrival and to be headed by Colonel and Lieutenant-Admiral Van Ghent, on the frigate Agatha. Baron Van Ghent was in fact the real commander of the expedition and had done all the operational planning, as he had been the former commander of the Dutch Marine Corps (the first corps in history to be specialised in amphibious operations) that now was headed by the Englishman Colonel Thomas Dolman.

On 6 June a fog bank was blown away and revealed the Dutch task force, sailing into the mouth of the Thames. On 7 June Cornelis de Witt revealed his secret instructions from the States General, written on 20 May, in the presence of all commanders. There were so many objections, while De Ruyter's only substantial contribution to the discussion was "bevelen zijn bevelen" ("orders are orders"), that Cornelis, after retiring to his cabin late in the night, wrote in his daily report he did not feel at all sure that he would be obeyed. The next day it transpired however that most officers were in for a bit of adventure; they had just given their professional opinion for the record so they could blame the politicians should the whole enterprise end in disaster. That day an attempt was made to capture a fleet of twenty English merchantmen seen higher up the Thames in the direction of London, but this failed as these fled to the west, beyond Gravesend.
The attack caught the English unaware. No serious preparations had been made for such an eventuality, although there had been ample warning from the extensive English spy network. Most frigates were assembled in squadrons at Harwich and in Scotland, leaving the London area to be protected by only a small number of active ships, most of them prizes taken earlier in the war from the Dutch. As a further measure of economy, on 24 March the Duke of York had ordered the discharge of most of the crews of the prize vessels, leaving only three guard ships at the Medway; in compensation the crew of one of them, the frigate Unity (former Eendracht, the first ship to be captured from the Dutch in 1665, from the privateer Cornelis Evertsen the Youngest) was raised from forty to sixty; also the number of fireships was increased from one to three. Additionally thirty large sloops were to be prepared to row any ship to safety in case of an emergency.[7] Sir William Coventry declared that a Dutch landing near London was very unlikely; at most the Dutch, to bolster their morale, would launch a token attack at some medium-sized and exposed target like Harwich, which place therefore had been strongly fortified in the spring. There was no clear line of command with most responsible authorities giving hasty orders without bothering to co-ordinate them first.
As a result, there was much confusion. Charles did not take matters into his own hands, deferring mostly to the opinion of others. English morale was low. Not having been paid for months or even years, most sailors and soldiers were less than enthusiastic to risk their lives. England had only a small army and the few available units were dispersed as Dutch intentions were unclear. This explains why no effective countermeasures were taken though it took the Dutch about five days to reach Chatham, slowly maneuvering through the shoals, leaving the heavier vessels behind as a covering force. They could only advance in jumps when the tide was favourable.
.jpg)
After raising the alarm on 6 June at Chatham Dockyard, Commissioner Peter Pett seems not to have taken any further action until 9 June when, late in the afternoon, a fleet of about thirty Dutch ships was sighted in the Thames off Sheerness. At this point the Commissioner immediately sought assistance from the Admiralty, sending a pessimistic message to the Navy Board, lamenting the absence of Navy senior officials whose help and advice he believed he needed. The thirty ships were those of Van Ghent's squadron of frigates. The Dutch fleet carried about a thousand marines and landing parties were dispatched to Canvey Island in Essex and opposite on the Kent side at Sheerness. These men had strict orders by Cornelis de Witt not to plunder, as the Dutch wanted to shame the English whose troops had sacked Terschelling during Holmes's Bonfire in August 1666. Nevertheless, the crew of Captain Jan van Brakel could not control themselves. They were driven off by English militia, and found themselves under threat of severe punishment upon returning to the Dutch fleet. Van Brakel offered to lead the attack the next day to avoid the penalty.
Charles ordered the Earl of Oxford on 8 June to mobilise the militia of all counties around London; also all available barges should be used to lay a ship's bridge across the Lower Thames, so that the English cavalry could quickly switch positions from one bank to the other. Sir Edward Spragge, the Vice-Admiral, learned on 9 June that a Dutch raiding party had come ashore on the Isle of Grain (a peninsula where the river Medway in Kent, meets the River Thames). Musketeers from the Sheerness garrison opposite were sent to investigate.
Only in the afternoon of 10 June did Charles instruct Admiral George Monck, Duke of Albemarle to go to Chatham to take charge of matters, a full three days later ordering Admiral Prince Rupert to organise the defences at Woolwich. Albemarle went first to Gravesend where he noted to his dismay that there and at Tilbury only a few guns were present, too few to halt a possible Dutch advance upon the Thames. To prevent such a disaster, he ordered all available artillery from the capital to be positioned at Gravesend. On 11 June (Old Style) he went to Chatham, expecting the place to be well prepared for an attack. Two members of the Navy Board, Sir John Mennes and Lord Henry Brouncker, had already travelled there on the same day. When Albemarle arrived, however, he found only twelve of the eight hundred dockyard men expected and these in a state of panic; of the thirty sloops only ten were present, the other twenty having been used to evacuate the personal possessions of several officials, such as Pett's ship models. No munitions or powder were available and the six-inch-thick iron chain built as a navigational barrier across the Medway had not yet been protected by batteries. This chain system had been built during the English Civil War to repel a possible attack by the Royalist fleet, replacing earlier versions, the first dating back to 1585. Albemarle immediately ordered the artillery to be moved from Gravesend to Chatham, which would take a day.
Attack
[edit]
The Dutch fleet arrived at the Isle of Sheppey on 10 June, and launched an attack on the incomplete Garrison Point Fort. Captain Jan van Brakel in Vrede,[8] ("peace") followed by two other men-of-war, sailed as close to the fort as possible to engage it with cannon fire. Sir Edward Spragge was in command of the ships at anchor in the Medway and those off Sheerness, but the only ship able to defend against the Dutch was the frigate Unity, which was stationed off the fort.
Unity was supported by a number of ketches and fireships at Garrison Point, and by the fort, where sixteen guns had been hastily placed. Unity fired one broadside, but then, when attacked by a Dutch fireship, she withdrew up the Medway, followed by the English fireships and ketches. The Dutch fired on the fort; two men were hit. It then transpired that no surgeon was available and most of the soldiers of the Scottish garrison now deserted. Seven remained, but their position became untenable when some 800 Dutch marines landed about a mile away. With Sheerness thus lost, its guns being captured by the Dutch and the building blown up, Spragge sailed up river for Chatham on his yacht Henrietta. Many officers were now assembled there: Spragge himself, the next day also Monck and several men of the admiralty board. All gave orders countermanding those of the others so that utter confusion reigned.
As his artillery would not arrive soon, Monck on the 11th ordered a squadron of cavalry and a company of soldiers to reinforce Upnor Castle.[9] River defences were hastily improvised with blockships sunk, and the chain across the river was guarded by light batteries. Pett proposed that several big and smaller ships be sunk to block the Musselbank channel in front of the chain. This way the large Golden Phoenix and House of Sweden (the former VOC ships Gulden Phenix and Huis van Swieten) and Welcome and Leicester were lost and the smaller Constant John, Unicorn and John and Sarah; when this was shown by Spragge to be insufficient, personally sounding the depth of a second channel despite the assurances by Pett, they were joined by Barbados Merchant, Dolphin, Edward and Eve, Hind and Fortune. To do this the men first intended for the warships to be protected were used, so the most valuable ships were basically without crews. These blockships were placed in a rather easterly position, on the line Upchurch–Stoke, and could not be covered by fire. Monck then decided also to sink blockships in Upnor Reach near Upnor Castle, presenting another barrier to the Dutch should they break through the chain at Gillingham. The defensive chain placed across the river had at its lowest point been lying practically nine feet (about three metres) under the water between its stages, owing to its weight, so it was still possible for light ships to pass it. Attempts were made to raise it by placing stages under it closer to the shore.
The positions of Charles V and Matthias (former Dutch merchantmen Carolus Quintus and Geldersche Ruyter), just above the chain were adjusted to enable them to bring their broadsides to bear upon it. Monmouth was also moored above the chain, positioned so that she could bring her guns to bear on the space between Charles V and Matthias. The frigate Marmaduke and Norway Merchant were sunk above the chain; the large Sancta Maria (former VOC ship Slot van Honingen of 70 cannon) foundered while being moved for the same purpose. Pett also informed Monck that Royal Charles had to be moved upriver. He had been ordered by the Duke of York on 27 March to do this, but as yet had not complied. Monck at first refused to make available some of his small number of sloops, as they were needed to move supplies; when he at last found the captain of Matthias willing to assist, Pett answered that it was too late as he was busy sinking the blockships and there was no pilot to be found daring to take such a risk anyway. Meanwhile, the first Dutch frigates to arrive had already begun to move the Edward and Eve away, clearing a channel by nightfall.
(Jan_van_Leyden,_1669).jpg)
Van Ghent's squadron now advanced up the Medway on 12 June, attacking the English defences at the chain. First Unity was taken by Van Brakel by assault. Then the fireship Pro Patria under commander Jan Daniëlsz van Rijn broke through the chain.[10] According to Dutch eyewitness Otto de Vooght and 17th century historian Gerard Brandt the chain was broken by a landing party of Dutch engineers commanded by Rear-Admiral David Vlugh using hammers. The more spectacular traditional version of events can be traced to a play by Joost van den Vondel.
Next the Matthias was destroyed by fire. The fireships Catharina and Schiedam attacked Charles V; Catharina under commander Hendrik Hendriksz was sunk by the shore batteries but Schiedam under commander Gerrit Andriesz Mak[11] set Charles V alight; the crew was captured by Van Brakel. Royal Charles, with only thirty cannon aboard and abandoned by her skeleton crew when they saw Matthias burn, was then captured by the Irishman Thomas Tobiasz, the flag captain of Vice-Admiral Johan de Liefde, and carried off to the Netherlands despite an unfavourable tide. This was made possible by lowering her draft by bringing her into a slight tilt. The jack was struck while a trumpeter played "Joan's placket is torn". Only Monmouth escaped. Seeing the disaster Monck ordered all sixteen remaining warships further up to be sunk to prevent them from being captured, making for a total of about thirty ships deliberately sunk by the English themselves. As Andrew Marvell satirised:
- Of all our navy none should now survive,
- But that the ships themselves were taught to dive
On 13 June, the whole of the Thames side as far up as London was in a panic—some spread the rumour that the Dutch were in the process of transporting a French army from Dunkirk for a full-scale invasion—and many wealthy citizens fled the city, taking their most valuable possessions with them. The Dutch continued their advance into the Chatham docks with the fireships Delft, Rotterdam, Draak, Wapen van Londen, Gouden Appel and Princess, under English fire from Upnor Castle and from three shore batteries. A number of Dutch frigates suppressed the English fire, themselves suffering about forty casualties in dead and wounded. Three of the finest and heaviest vessels in the navy, already sunk to prevent capture, now perished by fire: first Loyal London, set alight by Rotterdam under commander Cornelis Jacobsz van der Hoeven; then Royal James and finally Royal Oak, that withstood attempts by two fireships but was burnt by a third. The English crews abandoned their half-flooded ships, mostly without a fight, a notable exception being army Captain Archibald Douglas, of the Scots Foot, who personally refused to abandon Royal Oak and perished in the flames. Monmouth again escaped. The raid thus cost the English four of their remaining eight ships with more than 75 cannon. Three of the four largest "big ships" of the navy were lost. The remaining "big ship", Royal Sovereign, was preserved due to her being at Portsmouth at the time.[12] De Ruyter now joined Van Ghent's squadron in person.
Account by Samuel Pepys
[edit]
The diary of Samuel Pepys,[13] as secretary of the Navy Board, is often cited in descriptions of the raid, as it gives direct information about the attitude of the policy makers in this period and of the psychological impact of the attack.
Pepys at first seems to accept the consensus that the Dutch would not dare to launch an expedition against the London area; still on 18 April he writes:
(...)then to the office, where the news is strong that not only the Dutch cannot set out a fleete this year, but that the French will not, and that he [Louis XIV] hath given the answer to the Dutch Embassador, saying that he is for the King of England's having an honourable peace, which, if true, is the best news we have had a good while.
At that moment De Ruyter had already been on De Zeven Provinciën for a week. Nevertheless, he is aware of the preparations at Chatham, writing on 23 March:
At the office all the morning, where Sir W. Pen [sic] come, being returned from Chatham, from considering the means of fortifying the river Medway, by a chain at the stakes, and ships laid there with guns to keep the enemy from coming up to burn our ships; all our care now being to fortify ourselves against their invading us.
Also he is the next day present at the meeting where the details are given:
All their care they now take is to fortify themselves, and are not ashamed of it: for when by and by my Lord Arlington come in with letters, and seeing the King and Duke of York give us and the officers of the Ordnance directions in this matter, he did move that we might do it as privately as we could, that it might not come into the Dutch Gazette presently, as the King's and Duke of York's going down the other day to Sheerenesse was, the week after, in the Harlem Gazette. The King and Duke of York both laughed at it, and made no matter, but said, "Let us be safe, and let them talk, for there is nothing will trouble them more, nor will prevent their coming more, than to hear that we are fortifying ourselves".
Only on 3 June does Pepys become aware that the Dutch are out in force:
the Dutch are known to be abroad with eighty sail of ships of war, and twenty fire-ships; and the French come into the Channell with twenty sail of men-of-war, and five fireships, while we have not a ship at sea to do them any hurt with; but are calling in all we can, while our Embassadors are treating at Bredah; and the Dutch look upon them as come to beg peace, and use them accordingly; and all this through the negligence of our Prince, who hath power, if he would, to master all these with the money and men that he hath had the command of, and may now have, if he would mind his business.[13]
Not until 10 June does Pepys understand that the Thames is the target: "News brought us that, the Dutch are come up as high as the Nore; and more pressing orders for fireships." The next day a growing sense of panic becomes apparent:
Up, and more letters still from Sir W. Coventry about more fire-ships, and so Sir W. Batten and I to the office, where Bruncker come to us, who is just now going to Chatham upon a desire of Commissioner Pett's, who is in a very fearful stink for fear of the Dutch, and desires help for God and the King and kingdom's sake. So Bruncker goes down, and Sir J. Minnes also, from Gravesend. This morning Pett writes us word that Sheernesse is lost last night, after two or three hours' dispute. The enemy hath possessed himself of that place; which is very sad, and puts us into great fears of Chatham.
In the morning of the 12th he is reassured by the measures taken by Monck: "(...) met Sir W. Coventry's boy; and there in his letter find that the Dutch had made no motion since their taking Sheernesse; and the Duke of Albemarle writes that all is safe as to the great ships against any assault, the boom and chaine being so fortified; which put my heart into great joy."
Soon, however, this confidence is shattered: "(...)his clerk, Powell, do tell me that ill newes is come to Court of the Dutch breaking the Chaine at Chatham; which struck me to the heart. And to White Hall to hear the truth of it; and there, going up the back-stairs, I did hear some lacquies speaking of sad newes come to Court, saying, that hardly anybody in the Court but do look as if he cried(...)."[13]
Pepys immediately draws the conclusion that this will mean the end of Charles's regime and that a revolution is inevitable: "All our hearts do now ake; for the newes is true, that the Dutch have broke the chaine and burned our ships, and particularly "The Royal Charles", other particulars I know not, but most sad to be sure. And, the truth is, I do fear so much that the whole kingdom is undone, that I do this night resolve to study with my father and wife what to do with the little that I have in money by me(...)."[13]
On the 13th, the countermeasures proposed only increase his fears and make him decide to take his family and capital to safety:
No sooner up but hear the sad newes confirmed of the Royall Charles being taken by them, and now in fitting by them—which Pett should have carried up higher by our several orders, and deserves, therefore, to be hanged for not doing it—and turning several others; and that another fleete is come up into the Hope. Upon which newes the King and Duke of York have been below [London Bridge] since four o'clock in the morning, to command the sinking of ships at Barking-Creeke, and other places, to stop their coming up higher: which put me into such a fear, that I presently resolved of my father's and wife's going into the country; and, at two hours' warning, they did go by the coach this day, with about £1300 in gold in their night-bag.
The entire city is in a state of panic:
(...)never were people so dejected as they are in the City all over at this day; and do talk most loudly, even treason; as, that we are bought and sold – that we are betrayed by the Papists, and others, about the King; cry out that the office of the Ordnance hath been so backward as no powder to have been at Chatham nor Upnor Castle till such a time, and the carriages all broken; that Legg is a Papist; that Upnor, the old good castle built by Queen Elizabeth, should be lately slighted; that the ships at Chatham should not be carried up higher. They look upon us as lost, and remove their families and rich goods in the City; and do think verily that the French, being come down with his army to Dunkirke, it is to invade us, and that we shall be invaded.
Then even worse news is brought: "Late at night comes Mr. Hudson, the cooper, my neighbour, and tells me that he come from Chatham this evening at five o'clock, and saw this afternoon "The Royal James," "Oake," and "London," burnt by the enemy with their fire-ships: that two or three men-of-war come up with them, and made no more of Upnor Castle's shooting, than of a fly(...)."[13]
On the 14th more details become known of the events the previous day, showing the morale of the sailors: "[he] did hear many Englishmen aboard the Dutch ships speaking to one another in English, and that they did cry and say: 'We did heretofore fight for tickets; now we fight for dollars!' and did ask how such and such a one did, and would commend themselves to them: which is a sad consideration", and the mood of the people towards Charles "they did in open streets yesterday at Westminster, cry, 'A Parliament! a Parliament!'; and I do believe it will cost blood to answer for these miscarriages."[13]
The Dutch withdraw
[edit]
As he expected a stiffening English resistance, Cornelis de Witt on 14 June decided to forego a further penetration and withdraw, towing Royal Charles along as a war trophy; Unity also was removed with a prize crew. This decision saved the scuttled capital ships Royal Katherine, Unicorn, Victory and St George. However, Dutch sailors rowed to any English ship they could reach to set her on fire, thus ensuring their reward money. One boat even re-entered the docks to make sure nothing was left above the waterline of the English vessels Royal Oak, Royal James and Loyal London; another burned the merchantman Slot van Honingen, though it had been intended to salvage this precious ship. By chance, the shore facilities of Chatham Dockyard escaped destruction as no Dutch vessels reached her docks; the survival of these docks ensured the Royal Navy could repair her sunken ships.[12] English villages were plundered—by their own troops.[citation needed]
The Dutch fleet, after celebrating by collectively thanking God for "a great victory in a just war in self-defence" tried to repeat its success by attacking several other ports on the English east coast but was repelled each time. On 27 June an attempt to enter the Thames beyond Gravesend was called off when it became known that the river was blocked by blockships and five fireships awaited the Dutch attack. On 2 July a Dutch marine force landed near Woodbridge north of Harwich and successfully prevented Landguard Fort from being reinforced but a direct assault on the fort by 1500 marines was beaten off by the garrison. On 3 July an attack on Osley Bay failed. On 21 July Julian calendar peace was signed.[14]
But still, Samuel Pepys notes in his diary on 19 July 1667:
"The Dutch fleete are in great squadrons everywhere still about Harwich, and were lately at Portsmouth; and the last letters say at Plymouth, and now gone to Dartmouth to destroy our Streights' fleete lately got in thither; but God knows whether they can do it any hurt, or no, but it was pretty news come the other day so fast, of the Dutch fleets being in so many places, that Sir W. Batten at table cried, By God, says he, I think the Devil shits Dutchmen."[13]
And on 29 July 1667: "Thus in all things, in wisdom, courage, force, knowledge of our own streams, and success, the Dutch have the best of us, and do end the war with victory on their side".[13]
Aftermath
[edit]
Wharf official John Norman estimated the damage caused by the raid at about £20,000, apart from the replacement costs of the four lost capital ships; the total loss of the Royal Navy must have been close to £200,000.[15] Pett was made a scapegoat, bailed at £5,000 and deprived of his office while those who had ignored his earlier warnings quietly escaped any blame. Royal James, Royal Oak and Loyal London were in the end salvaged and rebuilt, but at great cost and when the City of London refused to share in it, Charles had the name of the latter ship changed to a simple London. For a few years the English fleet was handicapped by its losses during the raid, but by around 1670 a new building programme had restored the English Navy to its former strength.

The Raid on the Medway was a serious blow to the reputation of the English crown. Charles felt personally offended by the fact the Dutch had attacked while he had laid up his fleet and peace negotiations were in progress. His resentment was one of the causes of the Third Anglo-Dutch War as it made him enter into the secret Treaty of Dover with King Louis XIV of France. In the 19th century, several British writers expanded on this theme by suggesting that it had been the Dutch who had sued for peace after their defeats in 1666—although in fact these had made them, if anything, more belligerent—and that only by treacherously attacking the English had they nevertheless been able to gain a victory; an example of this is When London burned, written by the novelist G. A. Henty in 1895. In the short term, the Lord Chancellor, Edward Hyde was made the scapegoat, impeached and forced into exile.[citation needed]
Total losses for the Dutch were eight spent fireships and about fifty casualties. In the Republic the populace was jubilant after the victory; many festivities were held, repeated when the fleet returned in October, the various admirals being hailed as heroes. They were rewarded by a flood of eulogies and given honorary golden chains and pensions by the States General and the lesser States of the Provinces; De Ruyter, Cornelis de Witt and Van Ghent were honoured by precious enamelled golden chalices made by Nicolaes Lockeman, depicting the events. Cornelis de Witt had a large "Sea Triumph" painted, with himself as the main subject, which was displayed in the townhall of Dordt. This triumphalism by De Witt's States faction caused resentment with the rivalling Orangist faction; when the States regime lost its power during the rampjaar of 1672, Cornelis's head was to be ceremoniously carved out from the painting, after Charles had for some years insisted the picture would be removed.
Royal Charles, her draft too deep to be of use in the shallow Dutch waters, was permanently drydocked near Hellevoetsluis as a tourist attraction, with day trips being organised for large parties, often of foreign state guests. After vehement protests by Charles that this insulted his honour, the official visits were ended and Royal Charles was eventually scrapped in 1672; however, part of her transom, bearing the coat of arms with the Lion and Unicorn and the Royal inscription Dieu et mon droit, was preserved because Charles earlier had demanded its removal and it has since 1883 been put on display in the cellar of the Rijksmuseum in Amsterdam.[16]
On 14 March 2012 the transom was transported to England on board the Royal Netherlands Navy patrol ship Holland, accompanied by the then Dutch crown prince Willem-Alexander, where it was put on display, in commodate, at the National Maritime Museum in Greenwich as part of the Royal River: Power, Pageantry and the Thames exhibition held on the occasion of the Diamond Jubilee of Elizabeth II.[17]
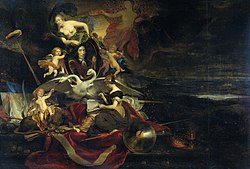
Gallery
[edit]-
 Charles Edward Dixon
 -
 Willem Schellinks
 -
 Willem Schellinks
 -
 Jeronymus van Diest II
 -
 Willem Schellinks
 -
 Ludolf Bakhuizen
 -
 Cornelis Bisschop
 -
 Willem Schellinks
 -
 Everhardus Koster
 -
 Eugène Isabey
 -
 Ludolf Bakhuizen
.jpg)

_Rijksmuseum_SK-A-1393.jpeg)
_-_Het_opbrengen_van_het_Engelse_admiraalschip_de_%27Royal_Charles%27.jpg)


_met_een_portret_van_Cornelis_de_Witt_Rijksmuseum_SK-A-1432.jpeg)


Commemoration
[edit]
In June 1967, the Dutch destroyer Holland made a courtesy visit to Chatham, with costumed Marine re-enactors on board, to commemorate the tercentenary of the Raid.
References
[edit]- ^ Coox 1949, pp. 226.
- ^ a b Coox 1949, pp. 229.
- ^ Second Anglo-Dutch War: Raid on the Medway by Kennedy R. Hickman, About.com (WebCite archive)
- ^ Franks, Horace George (1942). Holland Afloat. London. p. 98.
{{cite book}}: CS1 maint: location missing publisher (link) - ^ Rodger, N. A. M. (2004), The Command of the Ocean: A Naval History of Britain 1649–1815, Penguin Group, p. 76.
- ^ (in Dutch) Age Scheffer, Roemruchte jaren van onze vloot, Baarn 1966, p. 164.
- ^ (in Dutch) Age Scheffer, Roemruchte jaren van onze vloot, Baarn 1966, p. 161.
- ^ "Raid on the Medway, 9th June 1667 – 14th June 1667". Three Decks – Warships in the Age of Sail. Archived from the original on 15 March 2012. Retrieved 5 July 2011. ()
- ^ Paul Allen's Upnor Castle site (WebCite archive)
- ^ (in Dutch) Vlootinstructies en de eerste twee oorlogen met Engeland in de zeventiende eeuw, master's thesis by Rens de Viet, Erasmus University Rotterdam p. 53 (WebCite archive)
- ^ Gerrit Andriesz Mak, born in Schiedam in 1616 or 1617 in an old seafaring family, was, in peacetime, skipper on a herring boat. In 1659 Swedish privateers captured his boat and crew, but after two days he, with crew and boat, managed to escape. In 1667 he was made commander of the fireship 'Schiedam' for the 'Admiraliteit op de Maze'; 'Mak' in: L.A.F. Barjesteh van Waalwijk van Doorn en C.E.G. ten Houte de Lange (eds.), Honderd Schiedamse Families van 1795 tot 1940, Gronsveld and Rotterdam 2010.
- ^ a b Rodger, N. A. M. (2004), The Command of the Ocean: A Naval History of Britain 1649–1815, Penguin Group, p. 77.
- ^ a b c d e f g h Diary of Samuel Pepys – Complete by Samuel Pepys, Project Gutenberg
- ^ Dutch raid on the Medway, 19–24 June 1667, Military History Encyclopedia on the Web (WebCite archive)
- ^ (in Dutch) Age Scheffer, Roemruchte jaren van onze vloot, Baarn 1966, p. 178.
- ^ a b Royal Charles stern piece, preserved at the Rijksmuseum Amsterdam
- ^ (in Dutch) Kroonprins bezorgt museumstuk Archived 16 March 2012 at the Wayback Machine, Nederlandse Omroep Stichting, 14 March 2012.
Literature
[edit]- Charles Ralph Boxer: The Anglo-Dutch Wars of the 17th Century, Her Majesty's Stationery Office, London 1974.
- Coox, Alvin D. (1949). "The Dutch Invasion of England: 1667". Military Affairs. 13 (4): 223–233. doi:10.2307/1982741. JSTOR 1982741.
- Frank L. Fox: A distant Storm – The Four Days' Battle of 1666, the greatest sea fight of the age of sail, Press of Sail Publications, Rotherfield/ East Sussex 1996, ISBN 0-948864-29-X.
- Helmut Diwald: Der Kampf um die Weltmeere, München/ Zürich 1980, ISBN 3-426-26030-1.
- Roger Hainsworth / Christine Churchers: The Anglo-Dutch Naval Wars 1652–1674, Sutton Publishing Limited, Thrupp/ Stroud/ Gloucestershire 1998, ISBN 0-7509-1787-3.
- James R. Jones: The Anglo-Dutch Wars of the Seventeenth Century, Longman House, London/ New York 1996, ISBN 0-582-05631-4.
- Brian Lavery: The Ship of the Line, Bd.1, Conway Maritime Press, 1983, ISBN 0-85177-252-8.
- Charles Macfarlane: The Dutch on the Medway, James Clarke & Co., 1897.
- Alfred Thayer Mahan: Der Einfluß der Seemacht auf die Geschichte 1660–1812, Herford 1967.
- Alexander Meurer: Seekriegsgeschichte in Umrissen, Leipzig 1942.
- N. A. M. Rodger: The Command of the Ocean: A Naval History of Britain 1649–1815, New York, 2004 ISBN 0-393-32847-3
- P. G. Rogers: The Dutch on the Medway Oxford University Press, Oxford 1970, ISBN 0-19-215185-1.
- Age Scheffer: Roemruchte jaren van onze vloot, Baarn 1966
External links
[edit]Raid on the Medway
View on GrokipediaThe Raid on the Medway was a successful Dutch naval operation against English warships and dockyards along the River Medway in Kent from 9 to 14 June 1667, amid the Second Anglo-Dutch War (1665–1667).[1][2][3] Planned by Grand Pensionary Johan de Witt to exploit England's war-weary finances and neglected defenses, the raid involved a fleet under Lieutenant-Admiral Michiel de Ruyter navigating the Thames Estuary into the narrow Medway, where they breached a defensive chain at Gillingham using fireships and captured or destroyed multiple vessels at Chatham.[3][1][2] Key actions included the initial assault on Sheerness on 10 June, followed by advances upriver where Dutch forces under commanders such as Willem Joseph van Ghent burned ships including the Matthias, Charles V, Loyal London, Royal James, and Royal Oak, while capturing the flagship HMS Royal Charles—an 80-gun first-rate ship—which was towed to the Dutch Republic as a trophy and sold for scrap in 1673; its stern survives at the Rijksmuseum.[2][1][3][4] English defenses, hampered by incomplete fortifications and limited manpower under Admiral George Monck (Duke of Albemarle), inflicted fewer than 150 Dutch casualties but suffered over 500 of their own, underscoring the raid's tactical execution despite numerical disadvantages in the confined waters.[1][2] The raid's outcome inflicted severe material losses—estimated at a dozen major warships affected—and psychological humiliation on England, penetrating within 30 miles of London and disrupting trade via blockade, which accelerated peace talks and led to the Treaty of Breda on 31 July 1667, confirming wartime territorial exchanges under the principle of uti possidetis, such as England retaining New Amsterdam (New York) and the Dutch retaining Suriname.[5] Regarded as one of naval history's boldest strokes, it exposed systemic vulnerabilities in English naval administration due to fiscal overextension from prior battles like the Four Days' Battle, prompting long-term reforms but immediate parliamentary scrutiny of King Charles II's government.[1][2]
Historical Context
Second Anglo-Dutch War Origins
The Second Anglo-Dutch War stemmed primarily from entrenched commercial rivalries between England and the Dutch Republic, exacerbated by England's mercantile policies aimed at eroding Dutch dominance in international trade. Following the First Anglo-Dutch War (1652–1654), the Dutch continued to control much of Europe's carrying trade, transporting goods for other nations and undercutting English shipping interests protected by the Navigation Acts of 1651 and subsequent reinforcements, which mandated that goods to and from England be carried in English vessels.[6][7] English resentment focused on Dutch efficiency in bulk trade, fisheries, and entrepôt functions at ports like Amsterdam, which generated wealth enabling the Dutch to finance naval defenses and resist English expansion.[1] Under King Charles II, restored in 1660, English policy shifted toward proactive aggression to capture Dutch trade shares, influenced by chartered companies such as the Royal African Company (1660) and the expanded English East India Company, which sought monopolies in lucrative African slave trading and Asian spices.[6] This economic imperialism manifested in territorial seizures, including the unopposed English capture of New Netherland (renamed New York) on 24 September 1664 by Colonel Richard Nicolls with four frigates, justified as a preemptive strike against Dutch colonial threats.[8] Concurrently, in late 1663 to early 1664, Commodore Robert Holmes led a squadron that raided Dutch Gold Coast forts, destroying establishments at Accra and other sites, capturing over 150 guns, and seizing merchant vessels, actions that directly targeted Dutch African trade networks supplying bullion and slaves to Europe.[9] These provocations escalated into open hostilities with English naval attacks on Dutch convoys, including the seizure of ships in the English Channel and assaults on a West Indies fleet off Cádiz in September 1664, where English forces under Thomas Allin captured or destroyed dozens of vessels valued at millions of guilders.[6][8] The Dutch States General, facing these cumulative losses estimated at over 100 ships and widespread merchant outrage, formally declared war on 4 March 1665, though England had effectively initiated combat through its prior operations.[6] This declaration aligned with England's broader strategy to dismantle Dutch commercial primacy via naval superiority, privateering under letters of marque, and alliances like that with the Bishopric of Münster, revealing a causal progression from trade protectionism to deliberate maritime predation.[10]English Fiscal and Strategic Strain in 1667
In early 1667, the English government under Charles II faced acute fiscal exhaustion from the protracted Second Anglo-Dutch War, which had drained the treasury through escalating naval expenditures exceeding annual revenues. The crown's inability to fund fleet refits and crew wages culminated in a credit crisis, with the Exchequer halting payments in January, forcing reliance on emergency loans from London goldsmiths to avert total bankruptcy.[11] Persistent debts from the English Civil War further compounded the strain, as Charles II's courtly extravagance and war subsidies to allies like Münster eroded fiscal reserves, rendering large-scale naval operations unsustainable.[12] The Great Plague of 1665-1666 and the Great Fire of London in September 1666 exacerbated these pressures by decimating manpower and disrupting economic output critical to war financing. The plague claimed approximately 15% of London's population, including skilled laborers and tax-paying artisans, while reducing trade revenues that funded naval pay.[13] The fire destroyed over 13,000 houses and key commercial districts, slashing property taxes and merchant wealth at a time when customs duties—England's primary revenue source—were already diverted to war debts, leaving the government unable to muster full crews or maintain ships without risking desertions.[14] Strategically, these constraints forced Charles II to lay up most of the Royal Navy in "ordinary" status—dismasted and minimally guarded in river anchorages like the Medway—rather than risking open-sea engagements against a resurgent Dutch fleet. Following heavy losses in the St. James's Day Battle of August 1666, where English gains in ships were offset by irreplaceable casualties among experienced officers and seamen, the depleted fleet could not be fully recommissioned without funds, prompting a policy of minimal coastal squadrons in hopes of negotiating peace.[15] This "culpable unpreparedness" prioritized fiscal conservation over active defense, exposing anchorages to raid despite intelligence of Dutch preparations.[16]English Vulnerabilities
Defenses at Chatham and the Medway
The defenses protecting Chatham Dockyard and the River Medway in June 1667 were rudimentary and inadequately maintained, comprising static fortifications, a riverine boom, and the warships themselves moored upstream. Upnor Castle, erected between 1559 and 1567 on the west bank opposite the dockyard to guard against naval incursions, mounted approximately 20 guns but functioned primarily as a munitions storehouse by the time of the raid, with its garrison too small to fully operate the battery or mount an effective prolonged resistance.[2] [17] Additional batteries, such as those at Cockham Wood and along Gillingham Reach, remained under construction or lightly armed, offering minimal obstruction to an organized assault.[1] A key barrier was the 14.5-ton iron chain boom slung across the Medway at Gillingham Reach, designed to halt advancing vessels and backed by blockships if needed; however, it had not been fully tensioned or tested prior to the Dutch approach, allowing fireships to ram and sever it on 12 June.[1] [2] At the river's mouth, incomplete earthworks and a nascent fort at Sheerness provided scant protection, enabling the Dutch vanguard to seize the position with little opposition on 10 June.[1] These fixed defenses were supplemented by ad hoc measures, including the scuttling of ten warships as hulks to clog the channel, but such expedients reflected desperation rather than preparedness.[1] The moored fleet formed the core of the naval defenses, with around 20 major vessels laid up in ordinary along the Medway from Chatham upstream, including HMS Royal Charles (80 guns, the former flagship), HMS Royal James (82 guns), HMS Royal Oak (76 guns), and the newly built HMS Loyal London (90 guns).[3] [2] Most were demasted, partially dismantled for economy, and manned by skeleton crews—or none at all—owing to unpaid wages and England's depleted treasury following the 1666 Four Days' Battle, which left sailors deserting or refusing service.[1] Guardships like HMS Unity (42 guns) patrolled downstream but proved ineffective against coordinated fireships.[2] Overall readiness was compromised by chronic underfunding and administrative inertia; of roughly 1,100 dockyard workers and seamen available, only a handful initially engaged the enemy, with many fleeing amid the chaos on 12–13 June, exposing the strategic vulnerability of relying on immobilized assets without robust landward support.[1] [17] This configuration prioritized peacetime cost-saving over wartime vigilance, rendering the Medway a soft target despite its role as England's principal naval base.[2]Government Neglect and Decision-Making Failures
The English government's chronic financial shortages, exacerbated by the Great Plague of 1665 and the Great Fire of London in 1666, severely hampered naval preparations in early 1667, prompting King Charles II to order the laying up of most of the Royal Navy at Chatham to conserve limited funds amid stalled peace negotiations with the Dutch.[18][11] Parliament had approved £2.5 million for the war in 1664 and £1.8 million in 1666–67, but delays in disbursements, reliance on unreliable credit, and resistance to extending excise taxes left the treasury depleted, with sailors unpaid for months by March 1667, leading to widespread desertions and low morale.[19][1] This fiscal paralysis reflected broader decision-making flaws, as ministers prioritized short-term economies over sustained defense, assuming Dutch inactivity during ongoing talks despite intelligence warnings of potential raids.[19][16] Defensive measures at the Medway were grossly inadequate due to neglect in maintenance and provisioning; the iron chain boom across the river, intended to block intruders, lacked sufficient gunpowder and guards, rendering it ineffective when breached on June 12, 1667.[16][3] Sheerness Fort remained incomplete, Upnor Castle's batteries were understrength, and only three guard ships, three fireships, and minor vessels were stationed at Chatham on explicit orders from James, Duke of York, with available forces misdeployed to Harwich rather than reinforcing the vulnerable dockyard.[16] Dockyard commissioner Peter Pett failed to muster defenses effectively after initial alarms on June 6, with just 12 of 800 workers present by June 10 and fewer than three of 1,100 paid men contributing to resistance, underscoring systemic understaffing and absenteeism from unpaid wages.[16] Admirals and officials underestimated the raid's feasibility, ignoring five days of Dutch approach without erecting barriers or mobilizing militia, a lapse rooted in overconfidence from prior victories like Lowestoft in 1665.[16] Post-raid inquiries by Parliament scapegoated Pett for insufficient protections, leading to his bail at £5,000 and dismissal, though higher authorities who disregarded earlier warnings escaped accountability, highlighting political maneuvering to deflect blame from Charles II's administration.[17][20] These failures stemmed from a causal chain of fiscal myopia and optimistic diplomacy, where the government's aversion to further taxation trumped empirical risks of Dutch aggression, leaving England's premier naval base exposed despite its strategic proximity to London, just 30 miles away.[19][3]Dutch Planning
Michiel de Ruyter's Command and Objectives
Michiel Adriaanszoon de Ruyter, Lieutenant-Admiral-General of the Dutch fleet, assumed command of the expeditionary force in late May 1667, as authorized by the States General amid stalled peace talks in the Second Anglo-Dutch War.[1] His appointment leveraged his proven tactical acumen from prior engagements, positioning him to direct a fleet of approximately 60-70 warships and support vessels aimed at coastal raids.[21] De Ruyter's core objectives centered on disrupting English maritime power to compel advantageous treaty terms at Breda, targeting unprotected anchorages where fiscal exhaustion had left over 20 major warships decommissioned and minimally manned.[2] The strategy emphasized bold incursions into English home waters, prioritizing the destruction of naval infrastructure at Chatham's dockyards along the River Medway to erode morale and strategic capacity without risking a full fleet battle against superior numbers.[22] Upon anchoring in the Thames Estuary on June 7, 1667, de Ruyter refined the plan, dispatching squadrons under subordinates like Vice-Admiral Cornelis de Witte to breach defenses and ignite moored vessels, while he oversaw the operation from the main body to ensure coordinated fire support and rapid withdrawal if needed.[21] This approach reflected de Ruyter's emphasis on surprise, firepower from fireships, and exploitation of tidal geography, yielding the capture of HMS Royal Charles and the burning of several capital ships.[1]Fleet Composition and Tactical Innovations
The Dutch expeditionary fleet under Lieutenant-Admiral Michiel de Ruyter, assembled by early June 1667, totaled approximately 64 ships-of-the-line and frigates, augmented by 15 fireships and 20 smaller warships such as galliots, crewed by about 17,500 sailors and marines.[1] [23] This composition reflected the Dutch navy's emphasis on versatile, lighter vessels compared to the heavier English line-of-battle ships, enabling greater maneuverability in shallow coastal and riverine waters.[1] The fleet was organized into three squadrons: the van under Lieutenant-Admiral Willem Joseph van Ghent, featuring around 17 men-of-war of 36 to 60 guns optimized for aggressive inshore assaults; the center commanded by de Ruyter himself; and the rear under Lieutenant-Admiral Aert Jansse van Nes.[23] Van Ghent's squadron included key vessels like the 50-gun flagship Agatha and specialized fireships, with captains such as Jan van Brakel aboard the Vrede (a frigate of similar armament) providing leadership for breakthrough operations.[24] [23] Tactically, the Dutch prioritized a detached raiding squadron over committing the full fleet, using van Ghent's lighter force—supported by most of the 10 available fireships—to probe and exploit English anchorages while the main body provided offshore cover and diversion.[23] A critical element was the deployment of fireships to overwhelm the 14½-ton iron chain boom at Gillingham Reach, where on 12 June (New Style), a fireship rammed and ignited sections of the barrier, allowing van Brakel's Vrede to hook and break through under heavy fire, demonstrating refined incendiary tactics honed from prior engagements in the Second Anglo-Dutch War.[1] [23] This approach combined firepower suppression from frigates with rapid fireship launches, minimizing exposure of capital ships to shore batteries and exploiting the shallow Medway's navigational challenges, where Dutch pilots and smaller drafts conferred an advantage over the immobilized English vessels.[1] The raid's success underscored the viability of targeted commerce-raiding and anchorage strikes as alternatives to fleet-on-fleet battles, leveraging intelligence on English fiscal paralysis to achieve disproportionate impact with limited commitment.[23]The Raid Unfolds
Approach via the Thames Estuary
The Dutch fleet, commanded overall by Lieutenant-Admiral Michiel de Ruyter, departed from Texel in the Netherlands around 27 May 1667 (Old Style) and proceeded southward toward English waters. After a gale dispersed the ships, the fleet reassembled off North Foreland on 5 June, enabling coordinated movement into the Thames Estuary via the King's Channel, a principal navigational route from the North Sea. Anchoring there on 7 June, a council of war convened aboard De Ruyter's flagship De Zeven Provinciën under the oversight of Cornelis de Witt, who had devised the raid's strategy; the decision was made to detach a specialized squadron to penetrate the Thames and target the Medway anchorage at Chatham.[25][23] Joseph Baron van Ghent commanded the detached squadron, comprising about 17 men-of-war mounting 36 to 60 guns each, 10 fireships, and supporting galliots, drawn from the larger fleet of 64 ships-of-the-line, frigates, additional fireships, and smaller warships totaling around 17,500 personnel. On 9 June, as the main fleet lingered to reorganize, van Ghent's force advanced toward the Thames mouth and anchored at Hole Haven near Canvey Island, where a landing party sought provisions but encountered resistance from local English militia, suffering minor repulses without significant escalation. The same day, English lookouts sighted the Dutch presence off Harwich at the Thames Estuary's northern edge, triggering hasty militia mobilization and alarms in London, though chronic naval underfunding left coastal defenses sparse and reactive.[23][1][25] Unhindered by major English naval interception—owing to the Royal Navy's depletion after prior battles and peacetime layups—the squadron exploited favorable winds and tides to press southeastward through the estuary's shoals and channels. By 10 June, van Ghent's ships reached the Isle of Sheppey at the Medway's confluence with the Thames Estuary, initiating bombardment of the incomplete Sheerness Fort, which guarded the river entrance; minimal resistance allowed rapid capture, clearing the path for deeper incursions into the Medway proper. This approach demonstrated Dutch tactical adaptability, leveraging superior scouting and lighter-draft vessels suited to shallow estuary navigation, while English intelligence failures and delayed fortifications underscored systemic preparedness gaps.[25][1][23]Breach of the Medway Chain and Initial Assaults
On 12 June 1667, Vice-Admiral Willem Joseph van Ghent's Dutch squadron advanced up the Medway to Gillingham Reach, where the English had erected a heavy iron chain boom across the river as a primary defense, anchored by blockships including the frigate HMS Unity, the Matthias, and the Charles V.[23][21] The chain, suspended between these vessels and supported by shore batteries and Upnor Castle, aimed to block unauthorized access to the Chatham anchorage, but English defenses were undermanned and unprepared due to ongoing fiscal constraints.[1][26] Captain Jan van Brakel, commanding the Dutch frigate Vrede, spearheaded the assault by closing on Unity under heavy fire, boarding the English ship after a brief but intense cannonade and hand-to-hand combat that resulted in its capture with minimal Dutch casualties.[23][2] Supported by two fireships, van Brakel's action neutralized the southern anchor of the chain, while his forces also seized the crew of the burning Charles V.[26][2] Simultaneously, Dutch fireships executed the breach: the Pro Patria, under Jan Daniëlsz van Rijn, rammed or sailed over the chain, igniting the Matthias and disrupting the barrier, though the Catharina was sunk by English shore batteries and the Susanna failed to break through.[26][21] The Schiedam then set Charles V ablaze, compounding the chaos and forcing English defenders to abandon positions.[26] This coordinated tactic of direct assault and incendiary attack succeeded in severing the chain by mid-afternoon, opening the river for Dutch penetration despite resistance from Upnor Castle's guns.[1][23] The initial assaults inflicted immediate damage, with guardships destroyed or captured, but English forces scuttled additional vessels to block the channel, buying time amid disorganized counterefforts.[21] Van Ghent's vanguard, now unhindered, pressed forward toward Chatham, exploiting the breach to threaten the main fleet anchorage.[26]Capture of HMS Unity and Burning of Ships
As the Dutch squadron under Rear-Admiral Willem Joseph van Ghent advanced into the Medway on 10 June 1667, they encountered HMS Unity, a 32-gun fifth-rate frigate serving as a guardship near Sheerness and Garrison Point.[27] Commanded by Captain Francis Douglass, Unity fired a single broadside but withdrew when a Dutch fireship approached, allowing Dutch forces to close in.[28] Captain Jan van Brakel, aboard the Dutch frigate Vrede, led the boarding action, capturing Unity—a prize originally the Dutch ship Eendracht—after fierce hand-to-hand combat; Van Brakel sought to redeem an earlier defeat at Vågen.[29] [20] The captured vessel was later towed to the Netherlands as a trophy.[29] With Unity secured, the Dutch pressed upriver toward Gillingham Reach, where an iron chain blocked the narrows. Van Brakel in Vrede, supported by other warships, bombarded the chain and nearby fortifications, shattering it with concentrated cannon fire despite resistance from Upnor Castle and shore batteries.[2] This breach enabled fireships to be unleashed against the English fleet moored upstream at Chatham. The Dutch fireship Pro Patria, commanded by Jan Daniëlsz van Rijn, spearheaded the assault, igniting the unprotected ships Matthias and Carolus V, both of which exploded violently after catching fire.[29] [20] Anticipating the Dutch advance, English commanders had scuttled several capital ships farther up the Medway to deny them prizes, including the third-rate Royal Oak (76 guns), second-rates Royal James (70 guns) and Loyal London (80 guns), and others like Crown and Golden Phoenix.[16] Dutch fireships, directed under overall command of Lieutenant-Admiral Michiel de Ruyter, closed on these hulks on 11–12 June, setting them ablaze; the flames consumed the wooden structures to the waterline in a "dismal spectacle" observed by English witnesses, rendering salvage difficult despite later partial recoveries.[29] [2] In total, at least six major warships were destroyed by fire in this phase, alongside smaller vessels and dockyard stores, inflicting irreplaceable losses on the Royal Navy amid its postwar demobilization.[27]Eyewitness Perspectives
Samuel Pepys' Diary Entries
Samuel Pepys, serving as Clerk of the Acts to the Navy Board, documented the Raid on the Medway through diary entries that reflect both official responses and personal anxieties in London. His accounts, written contemporaneously, detail the progression of alarming reports from Chatham, defensive improvisations, and societal panic, without direct observation of the combat but informed by naval correspondence and eyewitness relays. These entries underscore administrative shortcomings and the psychological toll on English officials amid the Dutch incursion.[30] On 10 June 1667, Pepys recorded the Dutch fleet's bold advance to the Nore, triggering urgent dispatches of fireships to Chatham and inspections of dockyards at Deptford, Greenwich, and Woolwich, where preparations lagged despite available resources. He noted the Duke of Albemarle's oversight of scant defenses, gunfire echoes, and civilian evacuations fearing a Thames invasion, as the Dutch temporarily withdrew from positions like the Hope.[31] By 11 June, confirmation of Sheerness's fall escalated threats to the Medway, prompting Pepys and Sir William Batten to expedite fire-ship fittings while mobilizing trainbands; he collected over £400 in seamen's wages and highlighted public dread of national collapse under Dutch pressure.[32] The 12 June entry captures initial relief at reports of a secured chain boom, swiftly overturned by news of its breach, the burning of ships including HMS Royal Charles, and fires reaching Chatham docks, compelling Pepys to prioritize safeguarding his gold and documents against potential violence or regime downfall.[33] On 13 June, Pepys verified the Royal Charles's capture and Dutch fitting-out for towing, blaming Commissioner Pett for inadequate ship relocation; he dispatched his wife, father, and £1,300 in gold to rural safety, alongside £1,000 via courier under pretext, while retaining £300 personally amid reports of additional Dutch squadrons.[34] The 14 June account details three ships burned above Upnor Castle by Dutch boats, unpaid seamen's reluctance to engage without ticket settlements, sunken vessels like HMS Francis with lost stores, and mobs decrying governmental treason, including assaults on the Lord Chancellor's coach.[35] Reflecting post-raid on 30 June, Pepys toured Chatham and Rochester, inspecting wrecks of Royal Oak, James, and London, the severed Medway chain (links measuring 6.25 inches thick), armed workmen seeking redemption for desertions, and residual Dutch presence near Sheerness, noting the enemy's unexploited restraint despite English provocations.[36]
Military Reports and Dutch Accounts
English military reports from the Raid on the Medway emphasized the rapid Dutch advance and inadequate defenses. Commissioner Peter Pett at Chatham Dockyard raised the alarm on June 6, 1667, upon sighting Dutch ships near Sheerness, but subsequent reports highlighted failures in fortifying the river chain and mooring ships effectively, with only partial scuttling attempted as the Dutch breached Gillingham Reach on June 12.[25] Naval dispatches noted the capture of HMS Unity and the burning of Matthias and Charles V on June 12, followed by the destruction of Royal Oak, Royal James, and Loyal London under fire from Upnor Castle on June 13, attributing losses to insufficient gunpowder and manpower at key forts.[37] Post-raid inquiries, including examinations of Pett by parliamentary committees, documented the abandonment of dockyard stores and criticized delayed reinforcements from London, estimating over 10 ships damaged or destroyed with minimal Dutch casualties reported.[21] Dutch accounts, primarily from fleet commanders, portrayed the raid as a meticulously executed operation yielding strategic humiliation for England. Cornelis de Witt, as States General plenipotentiary, dispatched letters to the Estates-General on June 10, 12, and 13, detailing the squadron under Lieutenant-Admiral Willem Joseph van Ghent's capture of Sheerness Fort on June 10 with minimal resistance, securing artillery and stores for the advance.[25] In his June 12 missive, penned aboard the captured HMS Royal Charles, de Witt reported breaking the chain at Gillingham, towing away the flagship, and burning adjacent vessels, thanking divine providence for "humbling" the English fleet.[21] Michiel de Ruyter, arriving with the main fleet on June 12, coordinated the June 13 assault at Upnor Reach, commending Captain Jan van Brakel for leading fireships against anchored English capital ships, resulting in their conflagration despite defensive gunfire.[25] Van Ghent's reports underscored tactical innovations, such as using captured prizes for towing and boarding, with the Dutch withdrawing on June 14 bearing trophies like Royal Charles's stern decorations, having suffered fewer than 100 casualties against English losses exceeding 500 men and multiple vessels.[25] These accounts, drawn from ship logs and official correspondence archived in Dutch naval records, consistently highlighted English disarray and the raid's role in forcing peace talks, though de Ruyter noted risks of overextension in private councils.[38]Withdrawal and Immediate Pursuit
Dutch Retreat Under Fire
As the Dutch squadron under Cornelius de Witt prepared to withdraw from the Medway on 14 June 1667 (O.S.), towing the captured English prizes HMS Royal Charles (an 80-gun first-rate ship) and HMS Unity (a 44-gun frigate) along with several smaller vessels, it encountered intermittent artillery fire from English shore batteries, including those at Upnor Castle manned by Sir Edward Spragge.[39] The retreating Dutch navigated the river's narrow, twisting channels under duress, exacerbated by the refusal of local English pilots—previously coerced into aiding the initial advance—to provide further guidance, leading to several vessels temporarily grounding on mud banks before being refloated through expert seamanship.[39] English counter-efforts proved desultory and uncoordinated; while Spragge's guns inflicted some damage earlier in the raid, the pursuit during withdrawal lacked the ships and firepower to mount a serious threat, with fireships assembled under Admiral Sir Joseph Jordan at Harwich and the Thames' Hope anchorage arriving too late or ineffectively to engage the main Dutch force.[39][40] The Dutch sustained minimal additional losses beyond the raid's earlier toll, successfully extricating their squadron and prizes into open waters by 24 June, thereby evading a decisive English interception despite the harassing fire.[39] This retreat highlighted the Dutch fleet's tactical discipline under Vice-Admiral Michiel de Ruyter's overarching command, contrasting with English disarray stemming from depleted resources and delayed mobilization.[39]English Attempts at Interception
As the Dutch fleet began its withdrawal down the Medway on 14 June 1667, English shore batteries along the river inflicted intermittent artillery fire on the retreating squadron, though without inflicting significant damage or halting their progress.[25] Sir Edward Spragge, who had commanded the fragmented English defenses during the raid, directed limited harassment using surviving small vessels and fireships against the Dutch prizes and escorts, but these actions failed to disrupt the orderly retreat or recover captured ships like HMS Royal Charles.[25] [1] The English possessed few seaworthy warships capable of open-water interception, as the majority of the fleet remained laid up in ordinary due to chronic underfunding, unpaid crews, and widespread desertions exacerbated by the recent plague.[1] King Charles II issued orders for pursuit with whatever forces could be mustered, yet logistical constraints— including the scuttling of vessels to block channels and the destruction of key ships like HMS Loyal London and HMS Royal James—rendered any coordinated naval chase impossible.[21] This incapacity stemmed from peacetime economies that had prioritized fiscal restraint over readiness, leaving only ad hoc defenses reliant on land-based gunfire rather than a mobile striking force.[1] Spragge's squadron, numbering perhaps a dozen minor craft at most, exchanged fire with Dutch rearguards but suffered from inferior numbers and armament against de Ruyter's covering force of over 30 warships.[25] No English vessels ventured beyond the estuary to contest the Dutch exit into the Thames, allowing the raiders to disperse without further major engagement.[1] These feeble countermeasures highlighted systemic naval vulnerabilities, as post-raid assessments noted the absence of timely reinforcements or pre-positioned blocking squadrons.[1]Short-Term Aftermath
Quantifiable Losses to the English Fleet
The Dutch raid directly resulted in the burning or capture of at least thirteen English ships, including three capital ships and ten smaller vessels moored or laid up at Chatham.[16] Among the captured vessels was the flagship HMS Royal Charles, a first-rate ship of the line with approximately 80-100 guns, which was boarded, seized, and towed away to the Netherlands as a trophy by Cornelis de Witt.[2] HMS Unity, a frigate serving as a guardship, was the first major prize, overwhelmed and captured after a brief resistance near the chain boom.[1] The burned ships included three large capital ships—HMS Loyal London (90 guns), HMS Royal James (82 guns), and HMS Royal Oak (76 guns)—set ablaze by Dutch fireships and gunfire after breaching defenses.[16][1] Smaller vessels lost to fire included the guardship HMS Matthias and HMS Charles V, both ignited during the initial assaults on June 9-10, 1667 (Julian calendar).[2] These direct losses accounted for hundreds of guns and represented a substantial depletion of the Royal Navy's Chatham reserve fleet, which had been partially dismantled amid budget constraints following the earlier battles of the Second Anglo-Dutch War.[16] In response to the incursion, English commanders under the Duke of Albemarle scuttled an additional 16-30 warships farther up the Medway to block the channel and prevent their capture, exacerbating the overall toll on the fleet's operational capacity.[2][1] Personnel casualties numbered at least 500, including drowned sailors and those killed in combat or while abandoning ships.[1] The material damage, excluding replacement costs for the lost capital ships, was estimated by dockyard officials at around £20,000 in immediate repairs and stores destroyed.[20] These losses, while not crippling the entire Royal Navy, severely hampered its readiness and underscored vulnerabilities in home defenses.[16]Panic and Response in London
News of the Dutch fleet's breakthrough at Sheerness on 9–10 June 1667 reached London rapidly, prompting initial alarms as residents anticipated a potential escalation toward the capital.[16] Reports of fireships igniting English vessels in the Medway intensified the dread, with fears mounting that the invaders would proceed up the Thames to threaten London directly.[41] By 13 June, mass hysteria gripped the city, exacerbated by lingering traumas from the Great Plague of 1665 and the Great Fire of 1666, leading many to dispatch valuables from London in anticipation of occupation or sack.[2] Public reaction manifested in raw outrage and xenophobia, as economic hardships and naval humiliation channeled into mob violence against perceived enemies. Crowds targeted Dutch and French expatriates, resulting in widespread looting, assaults, and at least one documented lynching amid unchecked street disorder.[2] This unrest reflected deeper societal fractures, with the raid serving as a catalyst for pent-up frustrations over government mismanagement and foreign threats, though no organized resistance formed in time to alter the immediate crisis.[2] In response, King Charles II convened urgent consultations and directed the Earl of Oxford to muster the trained bands—the city's militia—from surrounding areas, aiming to bolster Thames defenses.[16] Artillery was hastily gathered from London armories, Gravesend, and Kent garrisons, while engineers improvised a barge-based causeway spanning the lower Thames between Kent and Essex to expedite troop deployments.[16] These measures, however, proved reactive and insufficient, constrained by prior fiscal retrenchments that had left coastal fortifications undermanned and the fleet largely immobilized.[16]Long-Term Consequences
Political Fallout for Charles II's Regime
The Raid on the Medway exposed profound deficiencies in Charles II's administration, amplifying existing parliamentary distrust toward the crown's handling of the Second Anglo-Dutch War. Financial shortfalls, stemming from inadequate tax collection and extravagant court expenditures, had left sailors unpaid—resulting in mutinies and desertions—and dockyards undermanned, directly contributing to the fleet's vulnerability on June 9–14, 1667.[42] This neglect, compounded by delayed parliamentary grants (such as the £1.8 million debated in the 1666–67 session), fueled accusations of corruption and incompetence against naval officials, including the dismissal of Chatham commissioner Peter Pett following public inquiries into the disaster's causes.[19][42] Criticism extended to high-level figures like James, Duke of York, who had advocated for aggressive war policies since 1664, yet failed to secure sufficient resources despite requests for £2.5 million that year.[19] The raid's humiliation—marked by the capture of HMS Royal Charles and burning of multiple warships—eroded the regime's prestige, portraying it as indecisive and fiscally irresponsible amid post-Restoration factionalism and economic strain.[42] Parliamentary reluctance to fund further naval efforts reflected broader skepticism, with debates highlighting government complacency and poor prioritization over military readiness.[19][42] While the event did not topple the regime, it intensified internal pressures, scapegoating lower officials while shielding the king, and underscored causal failures in fiscal policy and administrative coordination that undermined England's war aims.[42] The fallout manifested in accelerated peace overtures, as Charles II prioritized regime stability over prolonged conflict, yet it left a legacy of eroded confidence in monarchical governance capabilities.[19]Acceleration of Peace Negotiations and Treaty of Breda
The Raid on the Medway, occurring between June 9 and 14, 1667, decisively shifted the dynamics of peace negotiations in Breda, which had commenced in March but stalled due to King Charles II's reluctance to concede without naval leverage. The Dutch success in penetrating English defenses and destroying key ships exposed vulnerabilities in the Royal Navy, eroding Charles's confidence in prolonging the war.[43] This humiliation amplified existing war-weariness in England, compounded by financial strain from prior campaigns, compelling the crown to expedite talks to avert potential domestic revolt or additional raids.[20] By June 24, 1667, reports of the Medway incursion reached Breda, galvanizing negotiators and underscoring the Dutch Republic's resolve under leaders like Johan de Witt. Charles II, facing parliamentary criticism and logistical disarray in refitting his fleet, instructed envoys to concede on core issues, prioritizing cessation of hostilities over territorial gains.[44] The accelerated diplomacy reflected causal pressures: the raid's destruction of vessels like HMS Unity and HMS Royal Charles (the latter captured and towed away) rendered sustained English naval operations untenable without massive expenditure, estimated at over £100,000 for repairs alone in contemporary accounts.[45] The resultant Treaty of Breda, signed on July 31, 1667, formalized peace between England, the Dutch Republic, France, and Denmark, restoring pre-war alliances with modifications via the uti possidetis principle for wartime conquests. England retained New Netherland (rechristened New York) and other colonial holdings captured during the conflict, while the Dutch secured recognition of free navigation rights and the VOC monopoly in the East Indies, though without major territorial reparations from the raid itself.[46] This outcome, while inconclusive militarily, marked a pragmatic Dutch strategic victory by ending the war on terms that preserved their commercial dominance, as the raid's shock value deterred English escalation and stabilized negotiations within seven weeks.[43]Legacy and Analysis
Dutch Naval Achievements Versus English Failures
The Dutch raid on the Medway exemplified superior tactical execution and coordination under Lieutenant-Admiral Michiel de Ruyter, who orchestrated a daring incursion into the Thames estuary despite English numerical advantages in home waters. On June 9–10, 1667 (New Style), Dutch scouts probed Sheerness, capturing the fort after minimal resistance and seizing several vessels, setting the stage for the main assault.[1] By June 12–13, the Dutch fleet, comprising around 60 ships including fireships, breached the defensive chain boom at Gillingham with gunfire and boarding parties, penetrating deep into the river to target anchored English warships.[21] This operation destroyed or damaged at least 10 major warships, including the first-rates Royal James and Unity, and captured the flagship Royal Charles, which was towed back to the Netherlands as a trophy.[1] [21] Dutch forces employed innovative tactics, such as the effective use of fireships to ignite English vessels and rapid boarding actions that overwhelmed static defenses, resulting in minimal Dutch casualties estimated at 50 to 150 men.[1] The raid's success stemmed from meticulous intelligence gathering, including the use of defected English pilots, and de Ruyter's decisive leadership, which contrasted sharply with prior Dutch setbacks in open-sea battles.[2] This achievement not only inflicted material losses but also psychologically demoralized the English, demonstrating the vulnerability of their naval bases to bold amphibious operations.[16] In stark contrast, English failures arose from strategic complacency and logistical shortcomings following heavy losses in earlier engagements like the Four Days' Battle in 1666, which depleted the fleet and strained finances under Charles II's regime.[1] Key ships lay partially dismantled and unmanned at Chatham due to unpaid seamen and hopes for imminent peace, leaving them defenseless against fire.[16] Defensive measures, including the chain boom and shore batteries, proved inadequate; the boom was hastily erected and easily shattered, while ground troops under Commissioner Peter Pett failed to mount a coherent counterattack.[2] English casualties exceeded 500, with four capital ships lost outright and numerous smaller craft sunk or burned, underscoring systemic unpreparedness despite warnings from figures like Samuel Pepys.[1] [21]| Category | Dutch | English |
|---|---|---|
| Casualties | 50–150 | Over 500 |
| Major Ships Lost | Minimal (none reported) | 10+ destroyed/damaged; 1 captured (Royal Charles) |
| Tactical Outcome | Breach of defenses; trophy capture | Fleet crippled; bases exposed |