Community hub
Magnifier (Windows)
View on Wikipedia| Magnifier | |
|---|---|
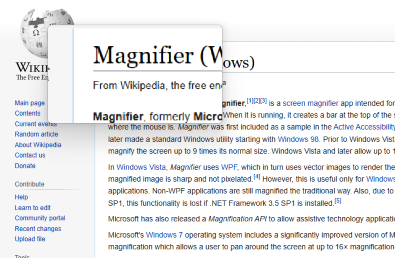
 Magnifier's lens mode on Windows 11 | |
| Developer | Microsoft |
| Included with | Windows 98 and later |
| Type | Screen magnification application |
Magnifier, formerly Microsoft Magnifier,[1][2][3] is a screen magnifier app intended for visually impaired people to use when running Microsoft Windows. When it is running, it creates a bar at the top of the screen that greatly magnifies where the mouse is. Magnifier was first included as a sample in the Active Accessibility SDK/RDK for Windows 95 and later made a standard Windows utility starting with Windows 98. Prior to Windows Vista, Magnifier could be used to magnify the screen up to 9 times its normal size. Windows Vista and later allow up to 16× magnification.
In Windows Vista, Magnifier uses WPF, which in turn uses vector images to render the content. As a result, the rendered magnified image is sharp and not pixelated.[4] However, this is useful only for Windows Presentation Foundation applications. Non-WPF applications are still magnified the traditional way. Also, due to a change introduced in WPF 3.5 SP1, this functionality is lost if .NET Framework 3.5 SP1 is installed.[5]
Microsoft has also released a Magnification API to allow assistive technology applications to use the Magnifier engine.[6]
Microsoft's Windows 7 operating system includes a significantly improved version of Magnifier. It features full-screen magnification which allows a user to pan around the screen at up to 16× magnification.
However, the full screen feature has also been criticized due to its incompatibility with the high contrast color schemes found in the Windows 7 beta release.[7] This issue remains in the final Windows 7 release. Besides this, when the magnifier zooms, the text will appear blurry or pixelated because it is not being directly rendered at the larger size; instead, the smaller sized rendering is being enlarged as a raster image. ClearType sub-pixel anti-aliasing is also magnified as a result of this, so if ClearType is active, the magnified text may appear to have unexpected colors at the edges of non-horizontal lines. Some third party magnification software compensates for this effect by applying scaling filters to the enlarged image.
The magnifier also features a lens mode similar to that found in the existing version[which?] of the software. Lens mode is improved, however, as now the magnifying window will follow the cursor around the screen rather than remain in a fixed position. Finally the magnifier is much easier to access by using the Windows key and +/- to control the zoom level without the need to start the application first.[8] Pressing the Win+Esc combination will exit the magnifier.
References
[edit]- ^ Chen-Yung Hsu & Mark M. Uslan (2000-07-01). "When Is a Little Magnification Enough? A Review of Microsoft Magnifier - AccessWorld - July 2000". American Foundation for the Blind. Archived from the original on 2004-05-13. Retrieved 2014-08-23.
- ^ Veli-Pekka Tätilä. "Magnifier & Narrator Review". Webbie.org.uk. Retrieved 2014-08-23.
- ^ "How to Install and Use Microsoft Magnifier". Support.microsoft.com. 2007-01-27. Retrieved 2014-08-23.
- ^ "Magnifier in Windows Vista". Blogs.msdn.com. Retrieved 2012-11-24.
- ^ "GPU-accelerated custom effects for WPF: Greg Schechter's blog". Blogs.msdn.com. 2008-05-12. Retrieved 2012-11-24.
- ^ "Magnification SDK". Msdn2.microsoft.com. 2012-10-16. Retrieved 2012-11-24.
- ^ "Windows 7 a dud for sight-impaired people". APC Magazine. Archived from the original on 2009-01-22. Retrieved 2012-11-24.
- ^ "Engineering Windows 7". Blogs.msdn.com. Retrieved 2012-11-24.